
How To Install Wwise As A Plugin In Unreal Engine - Mac
🛠️ Prerequisites:
-
Unreal Engine installed
-
Audiokinetic Launcher installed
-
A registered Audiokinetic account
-
The version of Wwise SDK matching your integration
✅ Step-by-Step Installation
Step 1: Open Audiokinetic Launcher
-
Launch the Audiokinetic (Wwise) Launcher.
-
Navigate to the Unreal Engine tab.
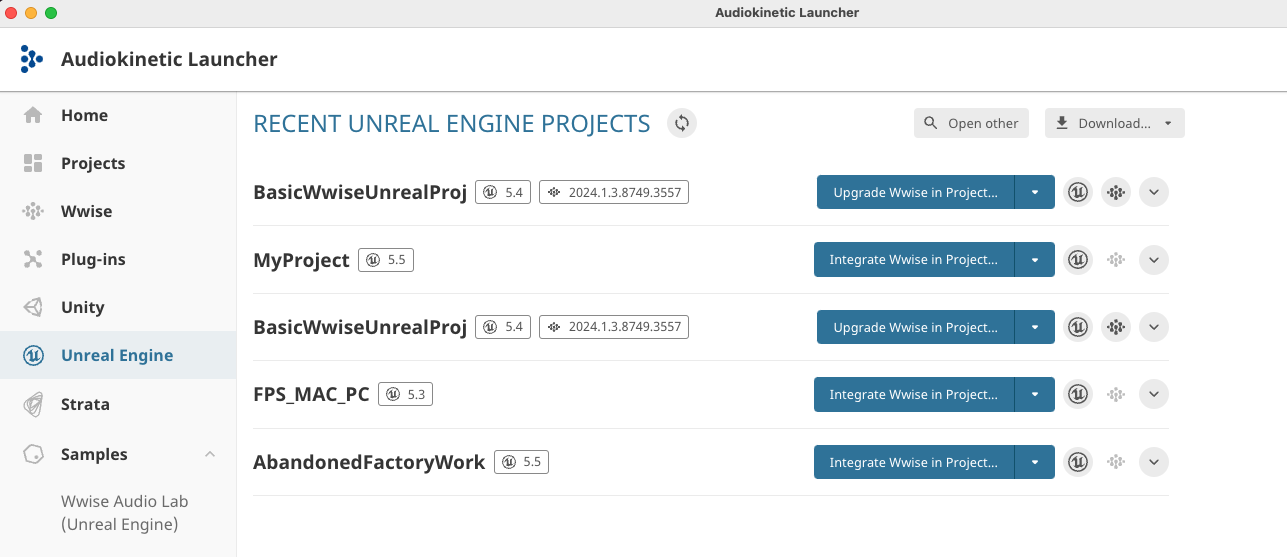
Step 2: Select Engine Plugin Integration
-
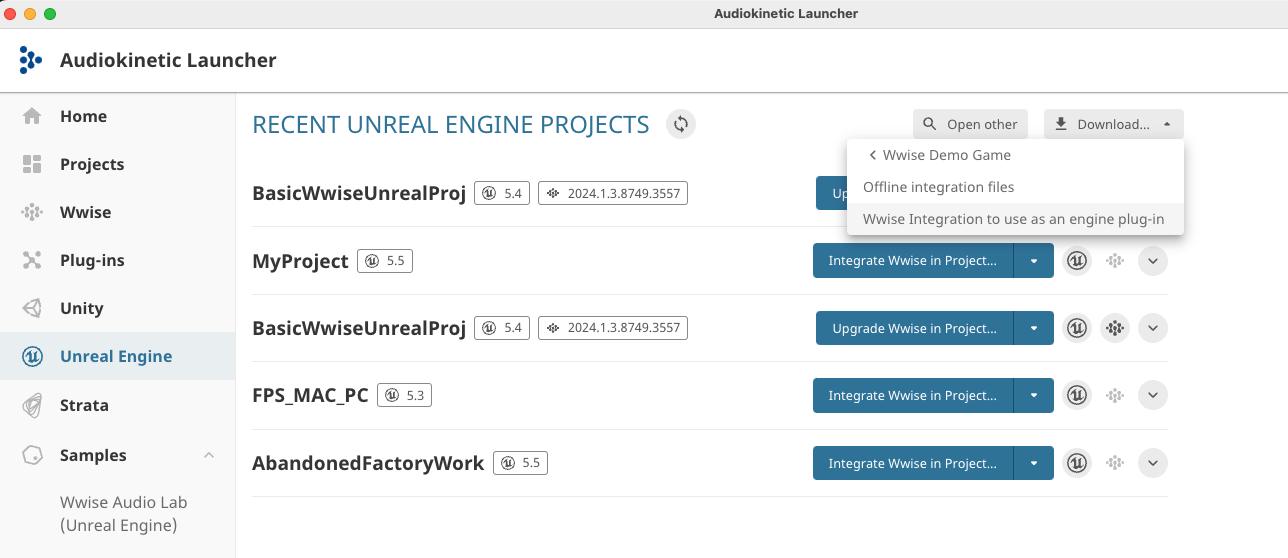
Click the Downloads tab in the launcher.
-
Choose Wwise integration to use as an engine plugin.
-
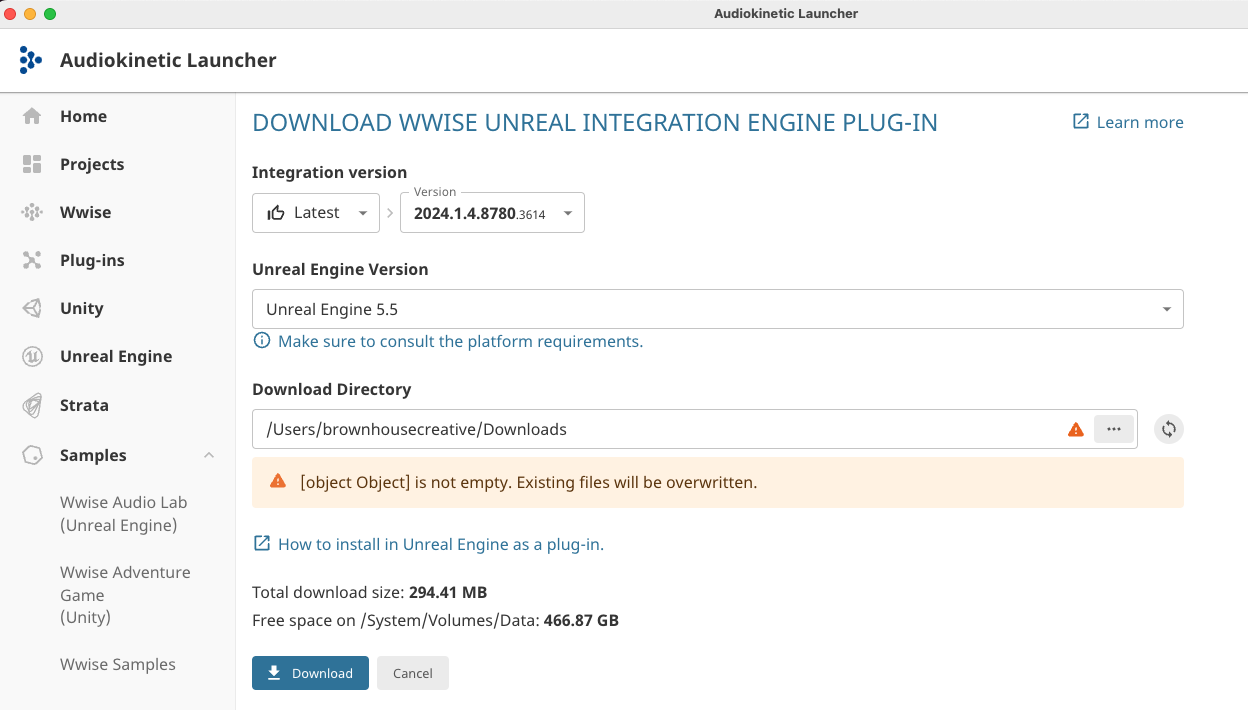
Select the Unreal Engine version (e.g., 5.5).
-
Change or make note of the destination folder to find the downloaded folders and files. I like to use the Downloads folder.
-
Start the download.
Step 3: Locate Downloaded Plugin Folders
-
After the download completes, you should see:
-
Wwisefolder -
WwiseNiagarafolder -
WwiseSoundEnginefolder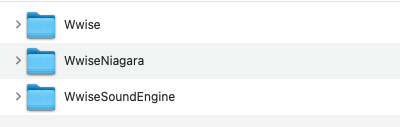
-
Step 4: Find Your Unreal Engine Installation
-
Navigate to where your Unreal Engine is installed → Unreal Engine → [version] → Engine → Plugins.
-
Example path:
Applications/Unreal Engine/5.5/Engine/Plugins
Step 5: Install Wwise Plugin into Unreal
-
Drag the three folders (
Wwise,WwiseNiagara,WwiseSoundEngine) into the Plugins folder in Unreal Engine.
Step 6: Launch Unreal Engine
-
Open Unreal Engine 5.5.
-
Create a new project (e.g., a game template) to verify plugin integration.
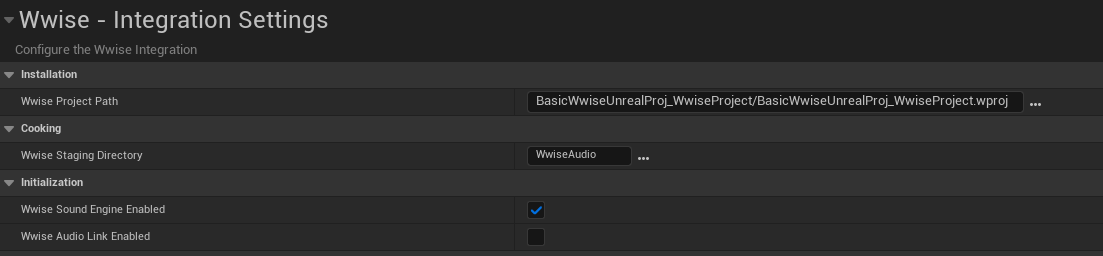
Step 7: Confirm Plugin Installation
-
A message may appear saying the sound bank folder is not set.
-
Click Yes to open settings.
-
You’ll need to create a Wwise project separately and:
-
Set the Wwise project path
-
Set the root output path for sound banks
-
-
-
This confirms the plugins are active.
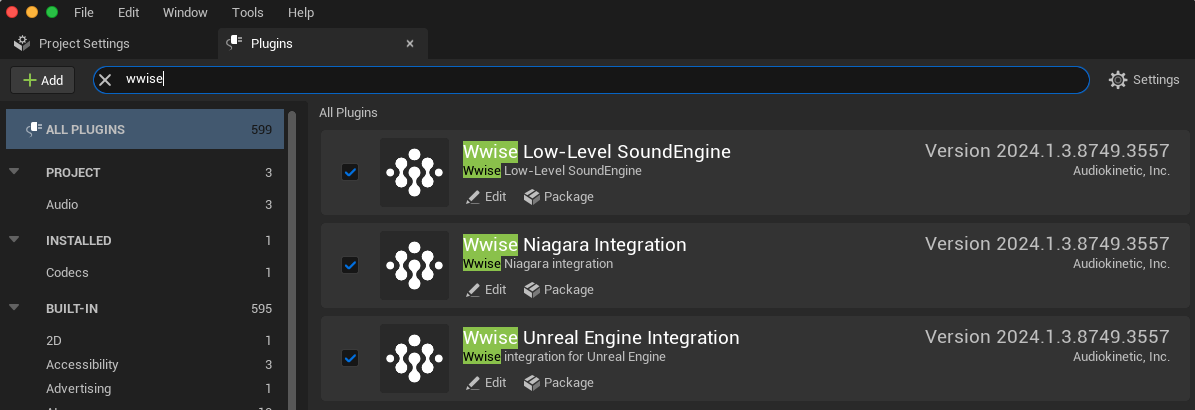
Step 8: Verify via Plugin Browser
-
Go to Edit → Plugins in Unreal.
-
Search for “Wwise”.
-
You should see the following plugins enabled:
-
Wwise Sound Engine
-
Wwise Niagara Integration
-
Wwise Unreal Engine Integration
-